>

sabato 23 giugno 2012

Idea VIntage!! ( trasferimento immagine)

To make the transfer, use gloves and cut a small slice of the roll of the resin clay.
Cut
Leave the gloves on and mix it together quickly with your fingers. Make sure it's fully mixed as it is a two part epoxy resin product.Mash
Use the tube it comes in and roll it out on a non-stick craft sheet or a piece of heavy black garbage bag.
Roll a
My favorite part is that I took a photo copy that I already had and used it for my transfer. No special paper or solutions. I just cut it out to shape and laid it face down on the wet clay and smoothed it in.
Transfer
I waited for 24 hours to be sure it was cured, but plan to try it in a shorter time period next time. Wet the back of the paper and then just rub it off, it comes off very very easily.
Transferred
trim to the size you like...rolled out thin plain scissors work.
Trim
File the edges and chip and mark them up to make the piece look more "found".
File
Coat the whole thing with dark brown acrylic paint and rub it off with a rag.
Wiped
Use a little bit of sand paper and scuffed it and then use a little more paint to cover up the white, just work it until it looks old and worn.
Rough up
Another option is to just attach to a metal book cover. The dry clay is now a piece of "plastic" so it's easy to drill and manipulate. You can drill it and make a faux rivet or use a nut and screw. If you are interested in this journal you can find the whole project in the next issue of Handcrafted Jewelry one of my favorite magazines.
Voila a

The lovely images you see above were given to me by Helga at Art Chix Studio...I have LONG admired her work and was so delighted to have her in my class at the Bead and Button show. We will be carrying some of her beautiful images very very soon!

venerdì 22 giugno 2012

Technique Tuesday: Wire-Wrapped Leather Ends

Here's a tutorial to show you how to wire wrap leather ends! Use this technique to attach leather to a clasp or other finding in your jewelry design. This particular technique works great for flat leather and suede laces!

Step 1: Cut about 5" of 22 gauge wire. Bend the wire over about 1/8" for the end, creating a hook.

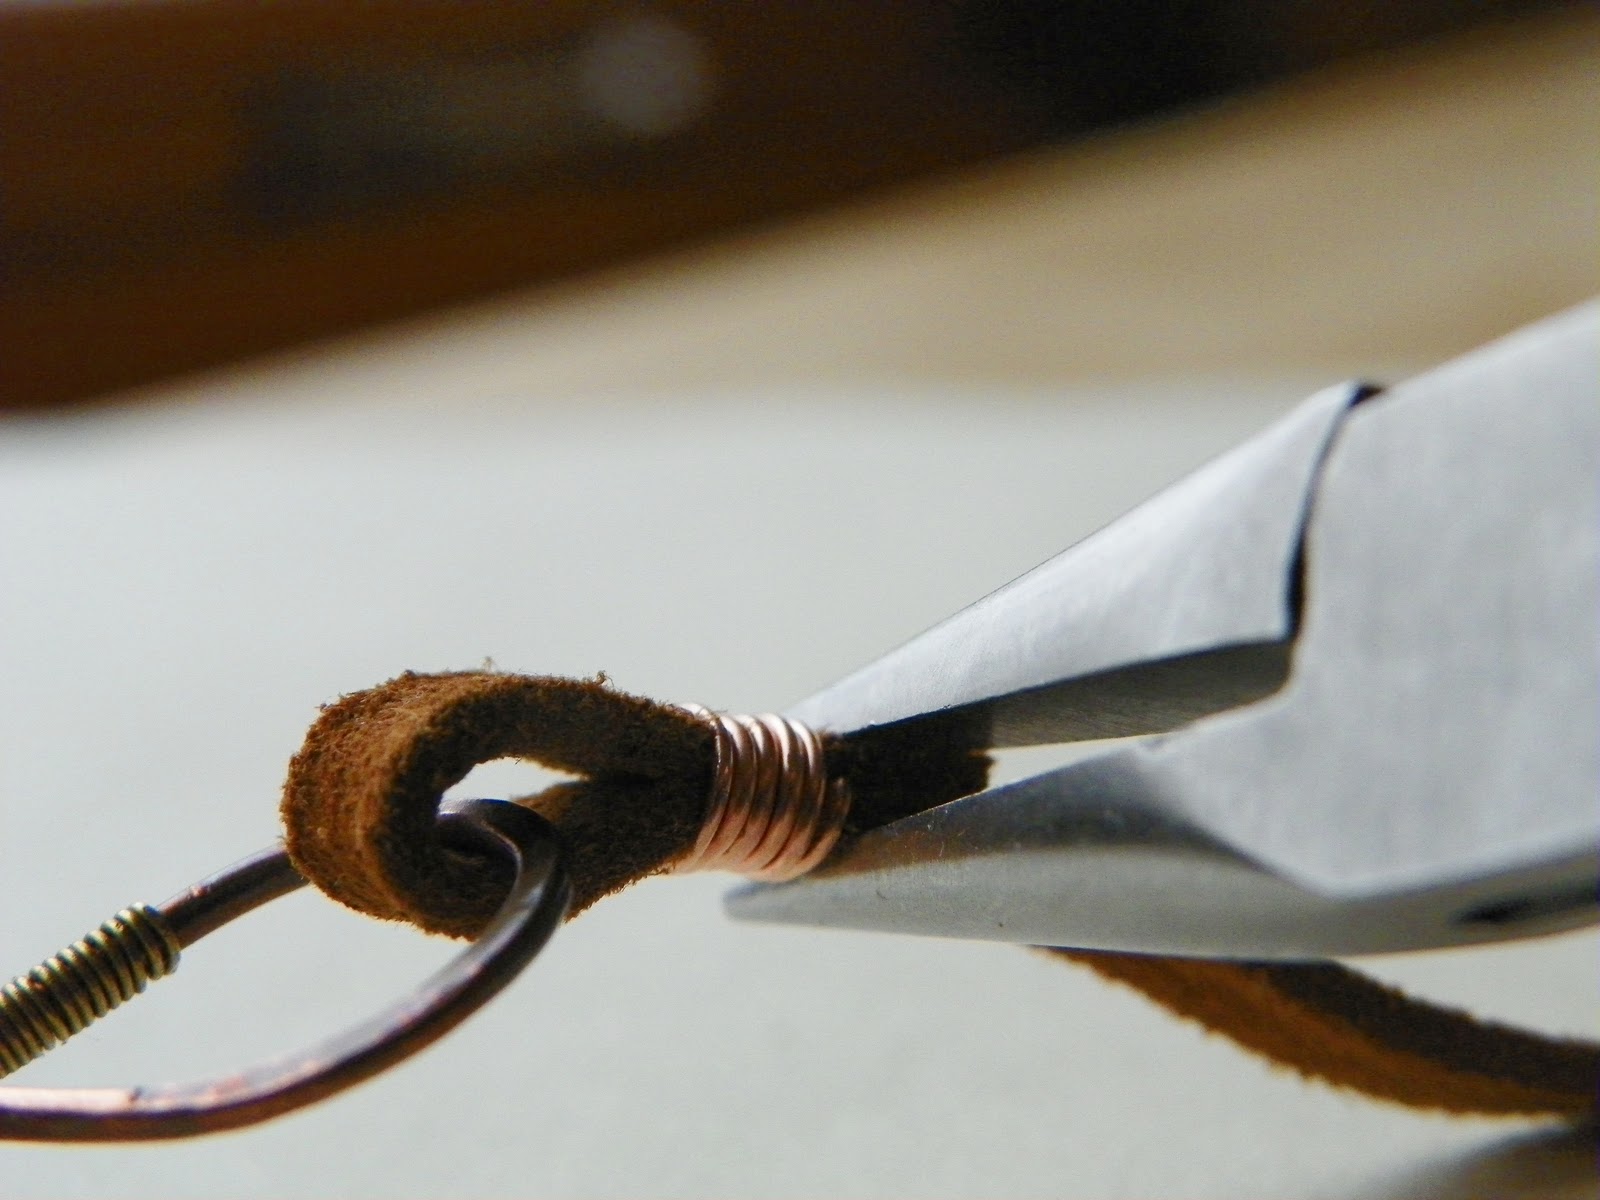
Step 2: Fold the leather around the clasp and back onto itself. Place the wire hook so that the wire end is tucked in between the folded leather. Crimp the wire down with chain nose pliers.

Step 3: Wrap the wire tightly around the doubled thickness of leather and continue wrapping 5 or 6 times.

Step 4: Bring the wire underneath the leather tail so that the wire lays in between the folded leather.

Step 5: Snip the wire with wire cutters, leaving a 1/8" tail.

Step 6: Crimp the wire down with chain nose pliers, making sure that the wire end is tucked tightly in between the folded leather.

Finished wire-wrapped end.

La pasta di Mais

La pasta di Mais è una pasta modellabile di origine naturale, facile da fare in casa, elastica e facilmente modellabile. Asciuga all'aria e la si può colorare in fase di preparazione oppure dipingerla dopo l'asciugatura. Gli oggetti costruiti con la pasta di mais hanno la trasparenza tipica della porcellana e non temono l'umidità.


Questi sono gli ingredienti:
  • 1 bicchiere (di plastica) colmo di amido di mais
  • 1 bicchiere (di plastica) colmo di colla vinilica
  • 1 cucchiaio da tavola di olio di glicerina
  • 1 cucchiaio da tavola di succo di limone
  • 1 pentola antiaderente
  • 1 cucchiaio di legno

Prepariamo la pasta di mais:
mettiamo nella pentola l'amido di mais, la colla, l'olio di glicerina ed il succo di limone e poi mescoliamo tutto per bene.

Poi mettiamo la pentola sul fuoco e cuociamo a fuoco moderato continuando a mescolare gli ingredienti.
Il composto che all'inizio era cremoso, con l'azione del calore del fuoco, comincia ora ad asciugarsi e quindi a diventare compatta. In questa fase è importantissimo che mescolare continuamente per evitare che bruci.
Togliere la pentola dal fuoco quando la pasta si stacca dalla pentola, perchè significa che è "cotta".
Ora la pasta deve essere messa su un piano da lavoro a raffreddare (marmo, formica o foglio di plastica) e deve essere lavorata con le mani fino a quando sarà liscia, elastica e non si attaccherà alle mani. In questa fase è possibile colorare la pasta di mais, che è bianca,

utilizzando i colori a tempera o gli acrilici: si divide la pasta ottenuta secondo le qantità e i colori che ci necessitano e vi si inserisce al centro una piccola quantità di colore, poi si continua la lavorazione con le mani fino al completo assorbimento del colore. Se con l'aggiunta di colore la pasta dovesse risultare troppo morbida, basta lasciarla per un po' all'aria in modo che evapori un pò di umidità oppure aggiungervi un pò di pasta bianca e poi continuare a manipolarla.
La pasta di mais può essere conservata per diversi giorni semplicemente avvolgendola con un pò di pellicola.
Related Posts Plugin for WordPress, Blogger...