>

mercoledì 17 ottobre 2012

Il sapone alla lavanda fatto in casa!!


Alla ricerca di qualche idea per natale sempre in stile handmade ho trovato questa simpatica idea..profumata!!

Sapone fatto da noi con olii essenziali..magari la nostra profumatissima lavanda che tanto curiamo in casa..ecco una idea semplice e di poca fatica..

Il risultato vi stupirà!


Per fare il SAPONE ALLA LAVANDA vi occorre:

Sapone di marsiglia
Miele di lavanda
Acqua qb
Olio essenziale di lavanda
Fiori di lavanda
Stampini da biscotti o stampini per il ghiaccio
Olio extra vergine d’oliva

Ungete con l’olio extra vergine d’oliva gli stampini dei biscotti o le formine del ghiaccio, se volete ottenere delle saponette più piccole.

Grattugiate con una grattuggia a fori grossi il sapone di marsiglia e mettetelo in un pentolino. Poi fatelo sciogliere a bagno maria, aggiungendo un po’ d’acqua e il miele di lavanda, per rendere il vostro sapone più nutriente. Mescolate energicamente.

Una volta sciolto e poi intiepidito, incorporate qualche goccia di olio essenziale di lavanda.
A piacere, potete aggiungere anche i fiorellini secchi all’impasto che poi verserete negli stampini.

Gli stampini andranno riposti in frigorifero per una notte intera. La mattina seguente togliete le saponette dagli stampini e adagiatele su un canovaccio pulito per farle asciugare completamente.
Potete legarci attorno degli steli di lavanda e trasformare le vostre saponette in originali segnaposto o forarle aiutandovi con una punta e creare, con uno spago, una corolla di saponette profumate da appendere nel vostro bagno.
Vi siete persi qualche passaggio? Guardate il  video posto qui sotto e seguite i vari passaggi, se invece la  sperimentazione casalinga non fa per voi? Nessun problema!
Potete acquistare il  sapone alla lavanda già confezionato in questo sito cercato tra il web.. e buona lavandata!!

sabato 13 ottobre 2012

BOTTONI E BOTTONI!!!!

 In giro per facebook si trovano diversi tutorial delle nostre colleghe americane..

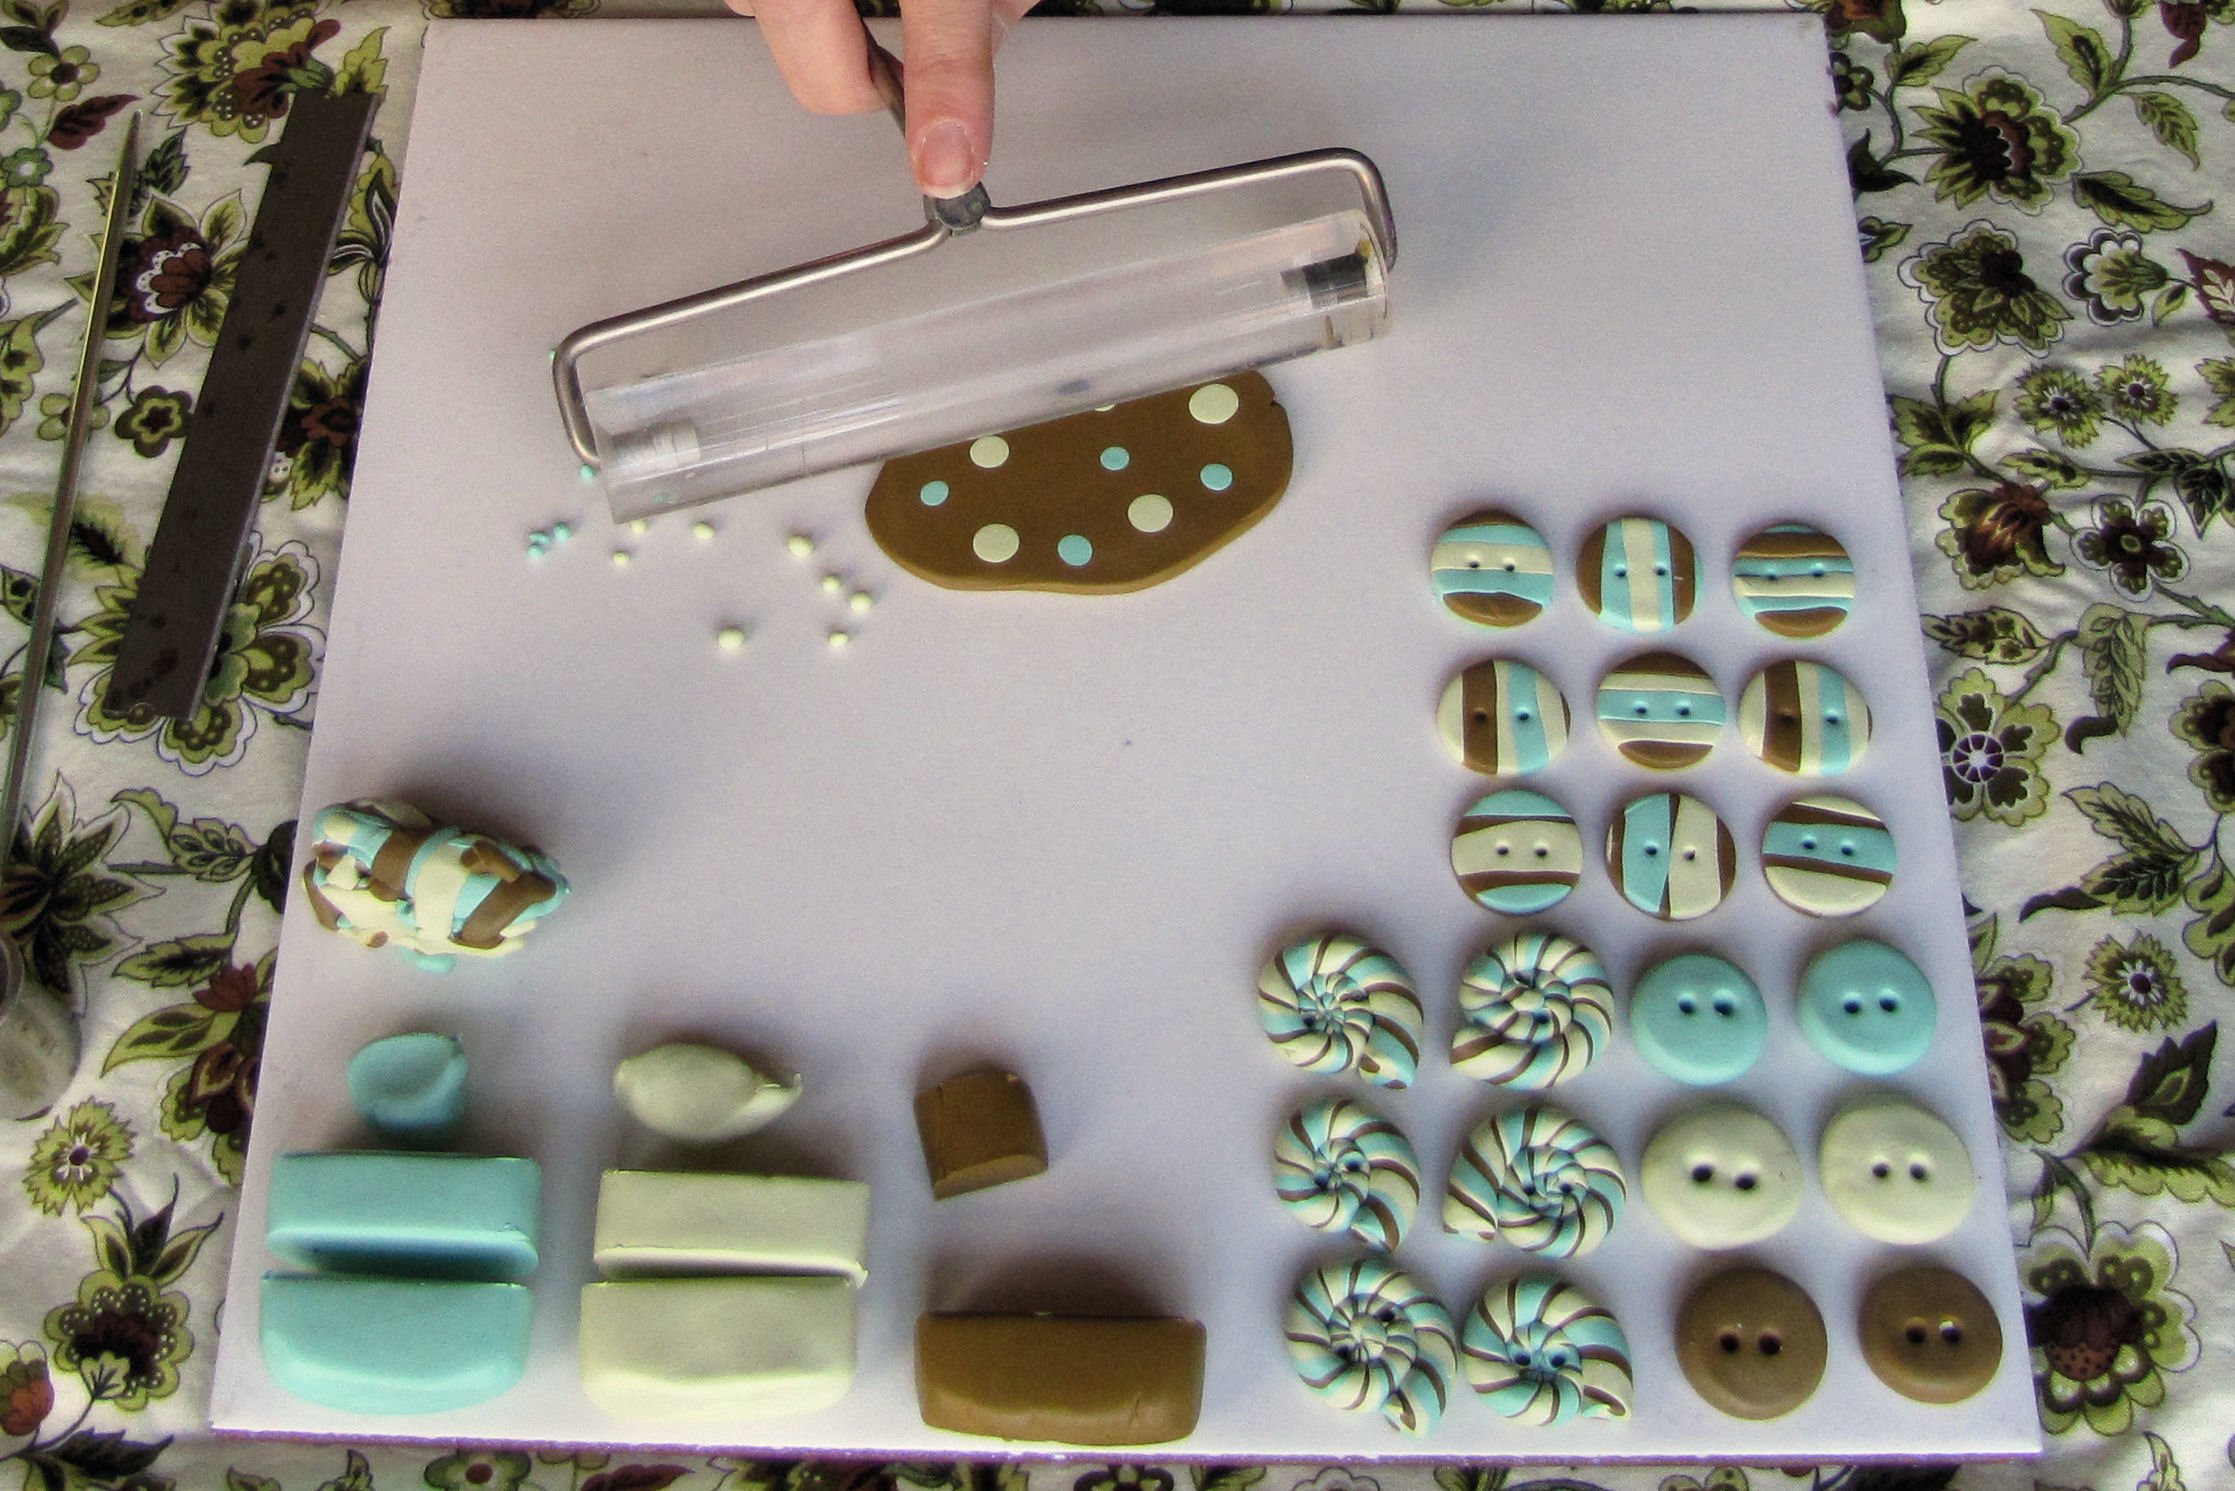
Qui un seguente di un grazioso passo a passo  su come fare bottoni in fimo..e tanta fantasia, sempre è l'ingrediente principale!!

Buon week ragazze della soffitta!!

Posted March 1st, 2011 by

[Sorry I'm late with this lesson - the stomach bug got me. Let's hope I've manage to be coherent with this through the last remnants of my fever!]
I hope you enjoyed making the Assymetrical Stripe Buttons last week. Be sure to go back and check the comments and galleries on the previous lessons, because often there are questions asked and answered – you might find the extra information helpful.
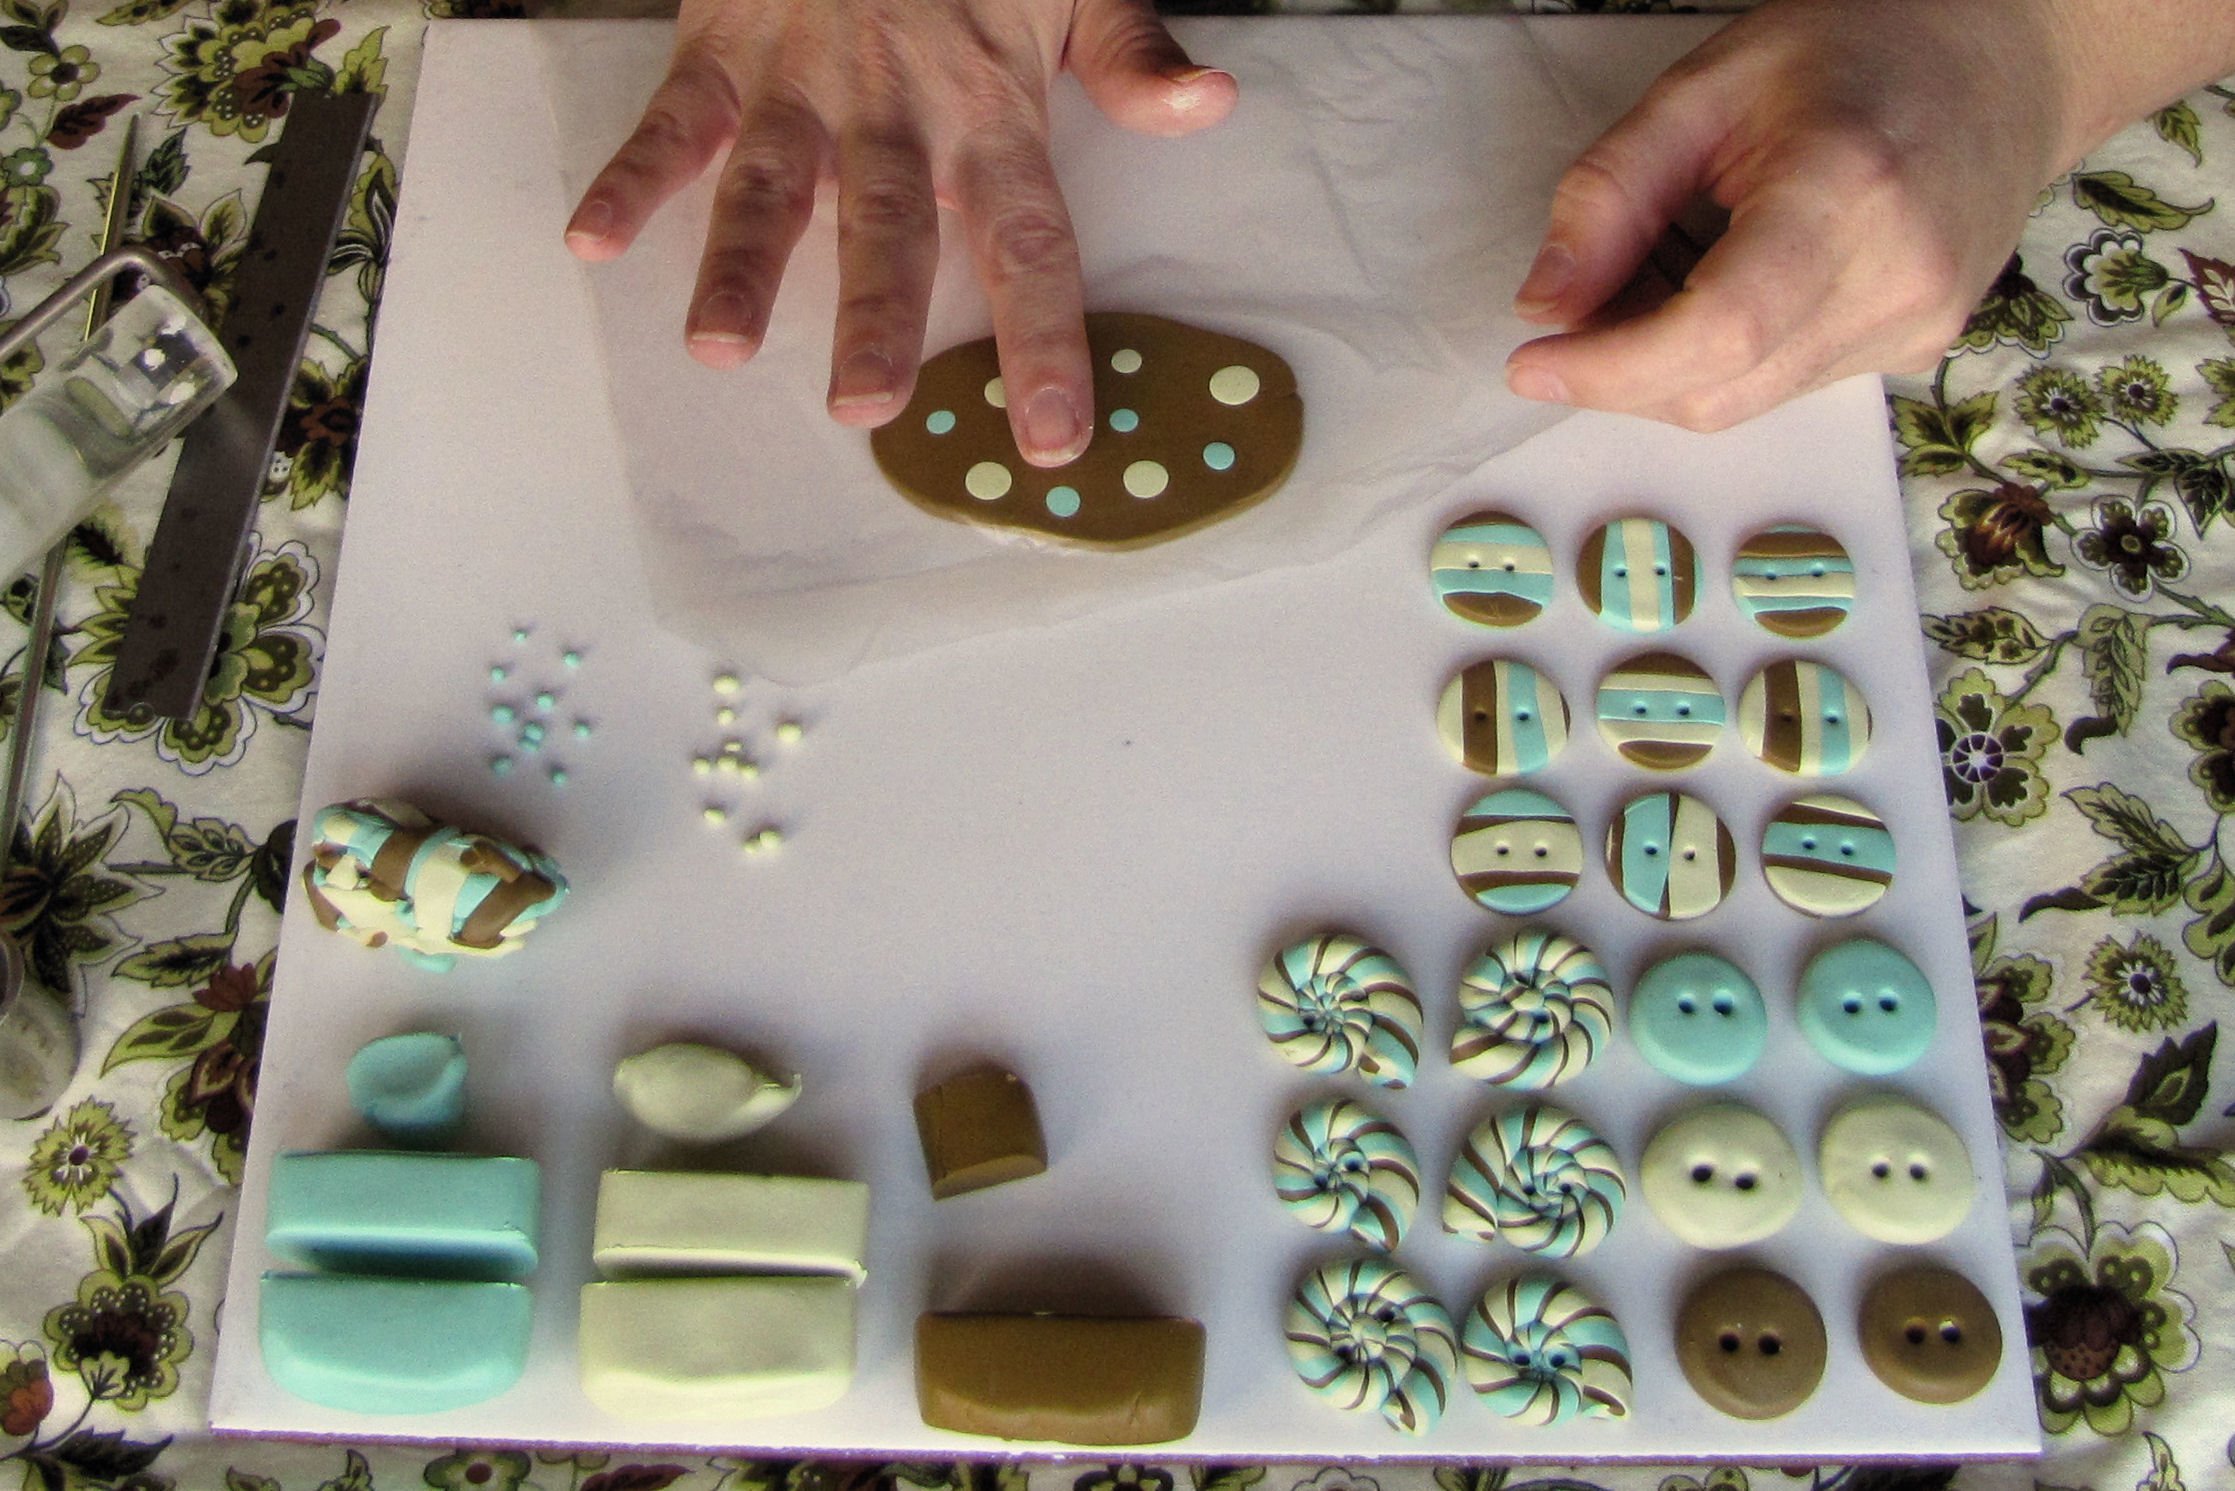
For this fourth lesson, we will be making large beveled-edge polka dot buttons. We’ll be making six of them, two in each background color.
If you need a refresher on Conditioning or Baking your clay, you can find these instructions, as well as a Supplies + Tools list in Lesson One.

Additional Tools

  • 1.25-inch round cutter. You can use the smaller cutter from the previous lesson for this, if you don’t want to buy another cutter. The technique is the same, you will just end up with smaller [and more] buttons.
  • brayer or acrylic rod.
  • sheet of plastic wrap like Saranwrap or deli wrap.

Directions


Just like we did with the striped buttons, we are going to start this set by flattening out a slab of clay. This time, though, we are using an entire 1/4 piece so that we may have enough space to cut out two large buttons.
Condition and roll out your base color until it’s between 1/8-inch and 1/4-inch thick. The slab should be large enough to cut out two buttons with your large circle cutter.
Pinch of tiny pieces of clay in your two accent colors, and roll them between your fingers into 1/8-inch balls.

Press the balls into the slab, flattening them as you do. Continue until you have a pleasing pattern.

Use the brayer to make sure the dots are firmly adhered to the base. It is not necessary to smooth out the joins between the two colors, but you can do so, if you like. Just be careful not to thin the base layer out too much.
Roll in multiple directions to avoid distorting the dots into ovals.

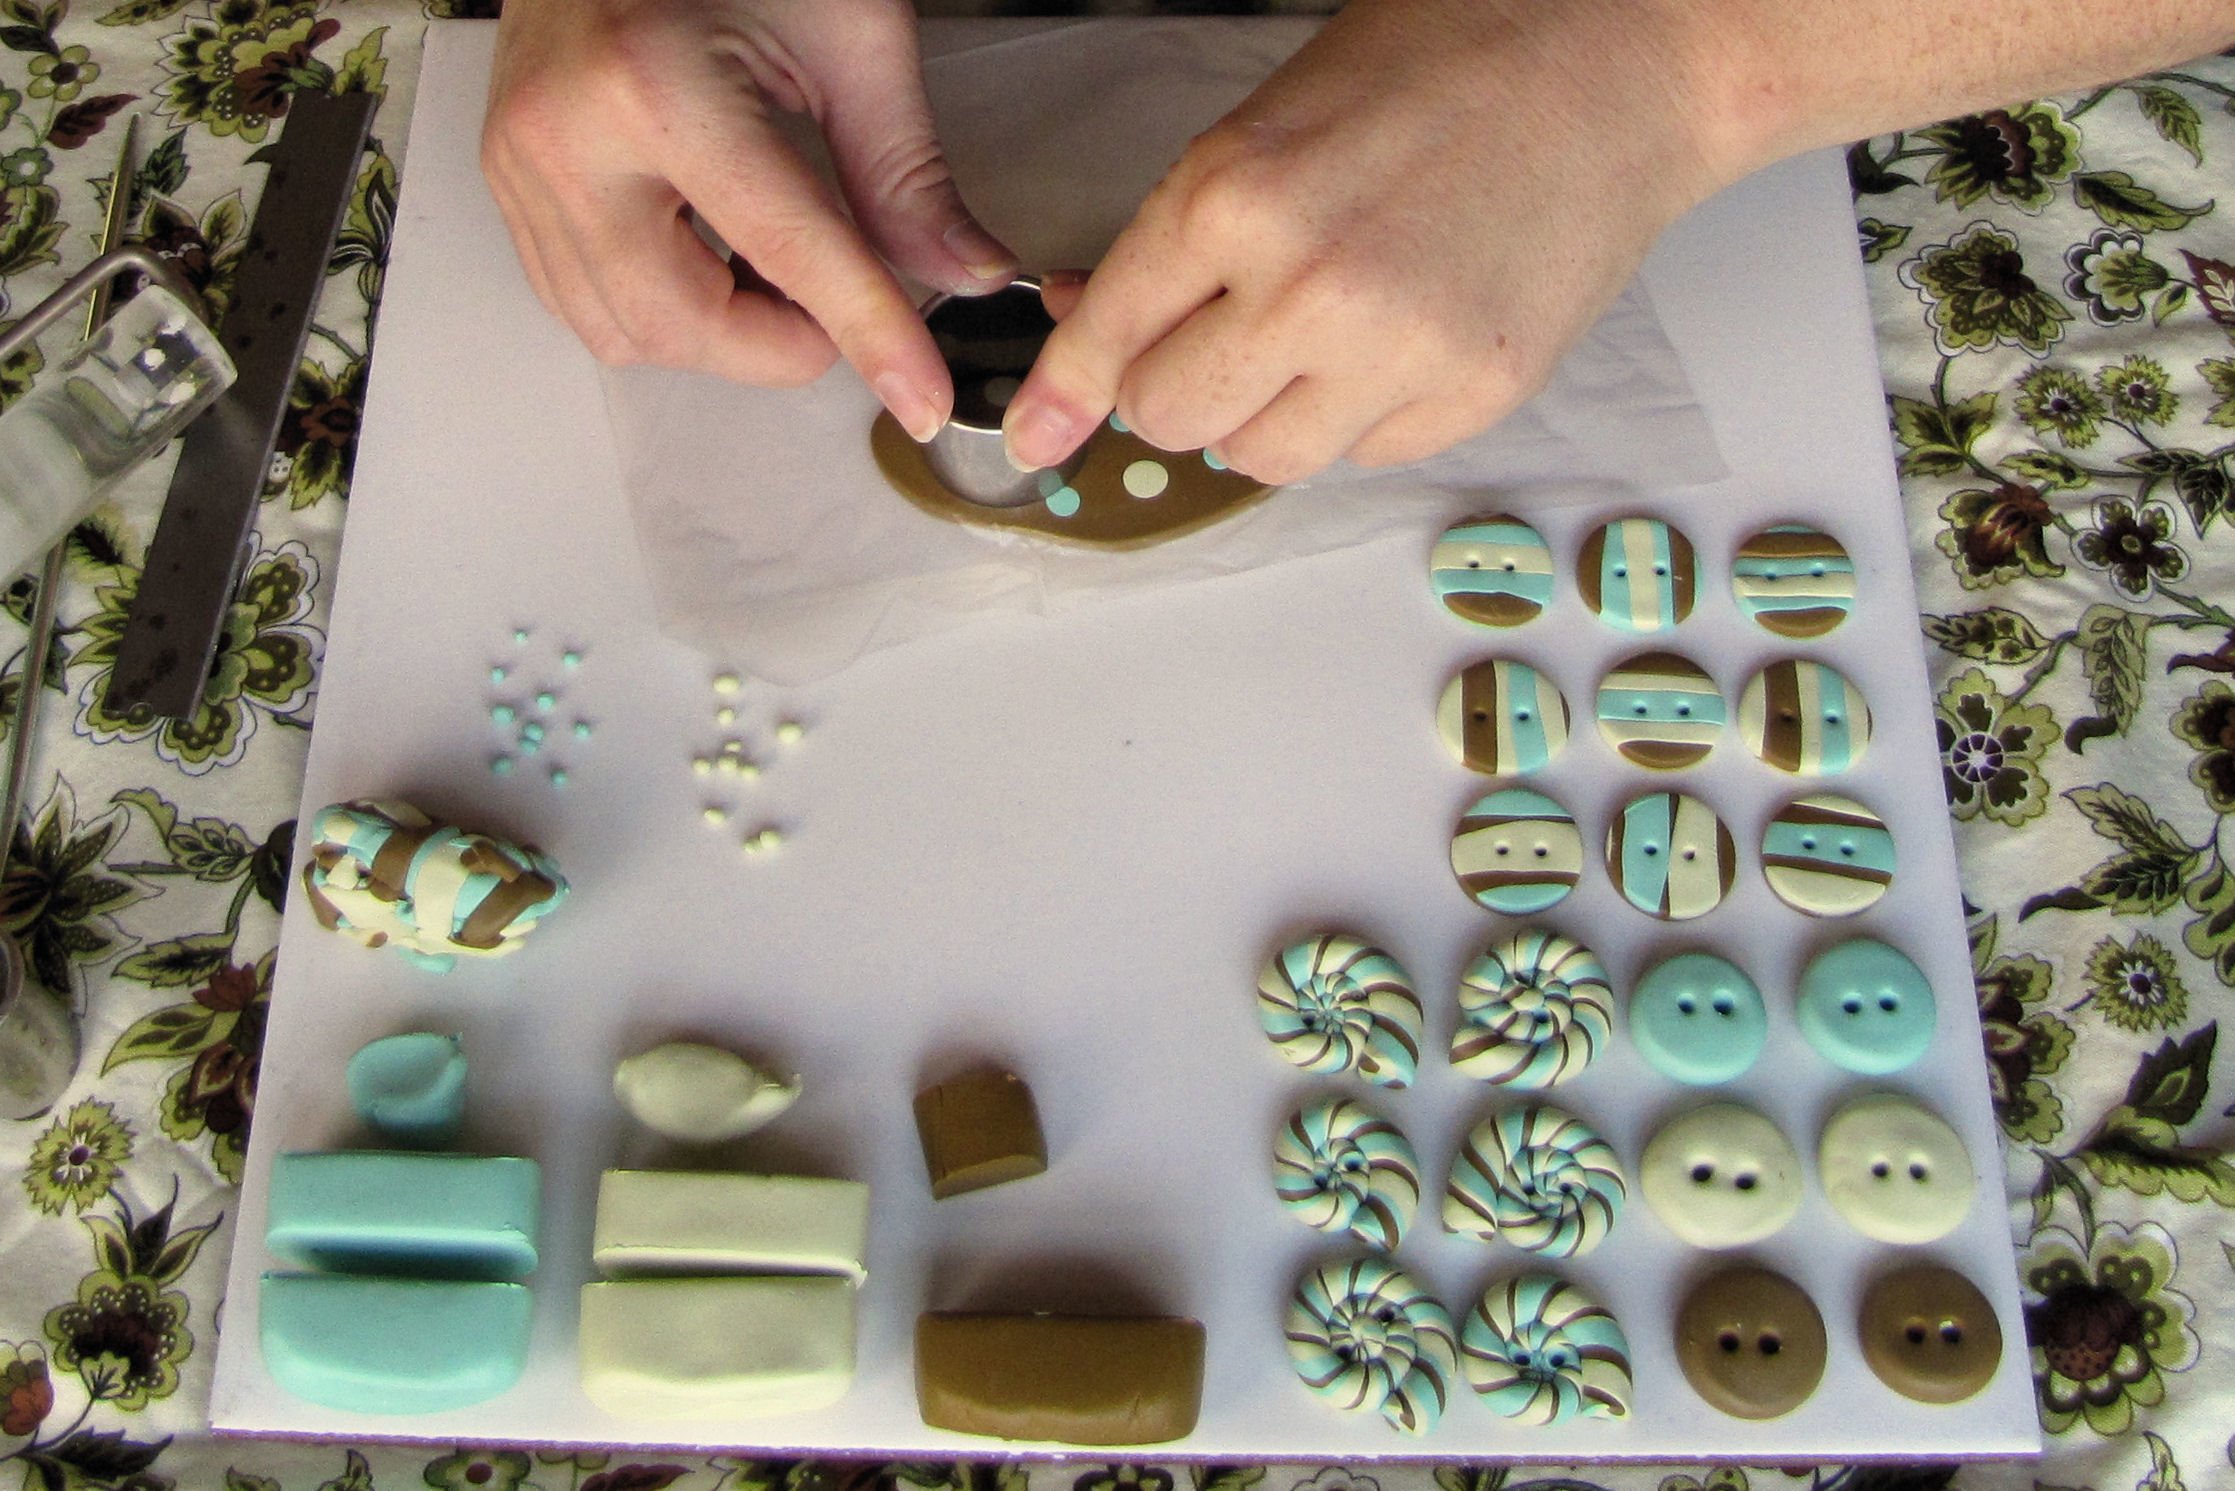
Place the sheet of plastic wrap over your slab, smoothing it down with your finger.

Cut your buttons, right through the plastic wrap, repositioning the wrap after each cut.

Do you see how nice and smooth the edges of these buttons are compared to the last set we made? The plastic wrap softens and bevels the cut edges.

Poke your holes, and you’re good to go!

venerdì 12 ottobre 2012

TU MI PORTI SU....

Lò sò è tardi..
Lò sò sembra strano..
Ma ho voglia della mia gente
dei miei ricordi infantili
dei miei piccoli spazi
del mio mare
del mio cielo stellato
dei miei fila di alberi
delle dolci colline
dei quell'accento scivoloso
dei mie profumi la mattina fuori casa
del mio porto con la gente che va e va
insomma tutto di lei
la mia città
Riccione!!!

Ed ecco questa canzone che non centra nulla
ma mi carica..mi fa tornare indietro nei miei posti
nel mio dire "dio boh!" ^_^

beh..scusate lo sfogo
ma ho bisogno di urlarloooooooooooooooooo!!

vi lascio oltre al mio sfogo questo detto romagnolo.. e un tramonto di Riccione....e un bacio a voi tutte!

Riccione: Alba Rosa
6 Ottobre 2012
I mille colori della nostra spiaggia.....anche in Ottbre.
foto Francesco Cavalli


 Foto: Riccione: Alba Rosa
6 Ottobre 2012
I mille colori della nostra spiaggia.....anche in Ottbre.
foto Francesco Cavalli


Un gòt e' fa ben, du i n' fa mel, u t'arvena un buchel!

Un gotto fa bene, due non fanno male, ti rovina un boccale!


Related Posts Plugin for WordPress, Blogger...