
Come sempre un giretto per la rete di un sabato sera e come sempre la soffitta cosa ha trovato??!
Un tutorial su come creare da noi orecchini con il filo in alluminio/rame e tanti charms luccicosi!! Per non dimenticarci dei mitici anni La febbre del Sabato Sera!!

Supplies

-Wire: I used 16 gauge and 20 gauge.
-Jump rings
-Small silver seed beads
-Earring Hooks
-Needle Nose Pliers
-Round Nose Pliers
-Wire Cutters
This project requires some wire work, but don't be scared! It's really
very doable. The most intense tools you will need are the hammer, hole
punch, and anvil. I linked up to Fusion Beads, a place where you can
order these with free shipping and a great bead supplier, if you are
really interested in wire work. Believe me, it's addicting!
Steps:
Step 1: Cut out various size pieces of 16 gauge wire . Mine ranged from about half an inch to two inches.

Step 2: Use the largest side of your chasing hammer to flatten
out the piece of wire on an anvil. Watch out for your finger on the
small pieces! You can use tape to hold the wire in place if you would
like.

This pictures shows the process of texturing the wire. The first one is
the original piece of wire. The second I hammered using the largest side
of the chasing hammer. The third I textured with the smaller side of
the chasing hammer.

The original anthro earrings had a texture more like the middle
version, but I decided it to texture it a little more because it makes
the silver "sparkle" more and I think looks prettier to wear!
Step 3: Finish hammering all your wire pieces and lay them out how you want it on each earring.
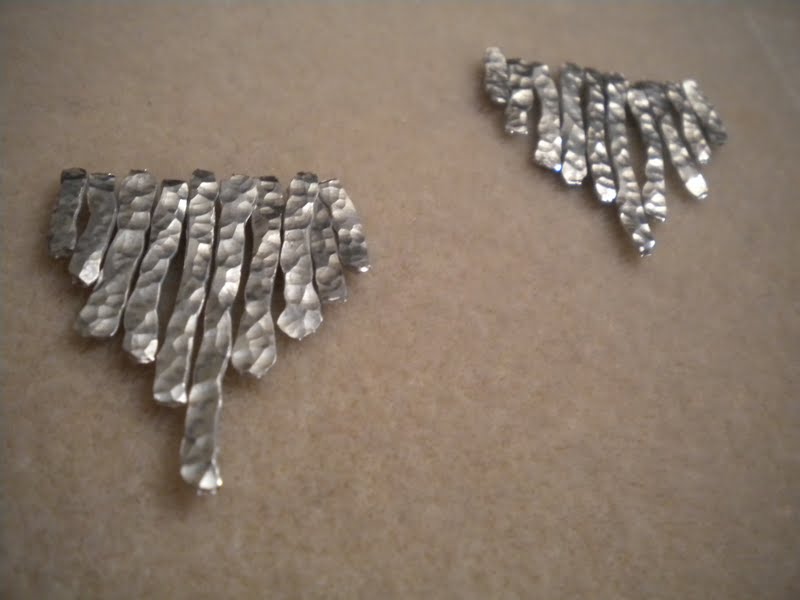
Step 4: Use a wire hole punch (LOVE THIS TOOL) to punch a hole on the top of each wire piece. Set aside.

Step 5: Cut two pieces of 20 gauge wire about five inches long. Create a loop at one end by using needle nose and rounded nose pliers.

Step 6: Gently bend wire into a tear drop shape. Hammer the form
lightly with the large side of the chasing hammer so it keeps it shape
better,

Step 7: String your earrings with silver seed beads and your
hammered wire pieces. Use a small jump ring to connect the wire piece to
the earring form.

Step 8: After you are finished stringing on all your pieces, for
another round loop on the end of the earring form. (sorry for the
blurriness...)

Step 9: Connect it around the original round loop on the other side to close the earring forms.

Step 10: Use two more small jump rings to attach earring hooks onto the earring form

And then you're done!

I had all the supplies laying around, so it didn't cost me anything. If
you don't have craft wire on hand, it's really not too expensive if you
get aluminum wire (which is what I used)


