>
Visualizzazione post con etichetta PENDENTE. Mostra tutti i post

sabato 14 luglio 2012

Oggi è il mio giorno Carpie Diem!!!

  
 Oggi  Vi racconto una storia che vi porta lontano... precisamene a San Leo!!

San Leo è una rocca che si trova a 32 km da Rimini  nella Valle Marecchia e si espone su un enorme masso roccioso tutt'intorno in valicabile; vi si accede per un'unica strada tagliata nella roccia.

 E un paesello dove sono affezionata e dove ogni anno non manco mai di rivederla..


Questa è la piazza centrale e qui la sera del 28 Agosto di ogni anno ce il ritrovo di maghi e maghi di ogni mondo..con le loro bancarelle e porzioni magiche..


Un posto, dove io e il mio compagno ci piacerebbe vivere un giorno.. dove la calma lha fa da padrona..dove la gente è ancora quella di una volta..con poche cose è il culto del vivere serenamente.
 Un posto magico, dove vivono fate e gnomi in allegria..
Per continuare la storia, San Leo fu meta di Dante e di Francesco D'Assisi , ma la magia, invece,  porta il nome del Conte Cagliostro.


A noi non interessa la vita di Giuseppe Balsamo Conte di Cagliostro, ne i motivi che lo portarono davanti al tribunale dell'Inquisizione.

Resta il fatto che 7 aprile 1790 il Tribunale dell'Inquisizione, addirittura presieduto dal Segretario di Stato cardinale Zelada, emisa la condanna a morte per Cagliostro.

In seguito dopo aver fatto pubblica rinuncia dei principi eretici professati, Cagliostro ottenne la grazia.

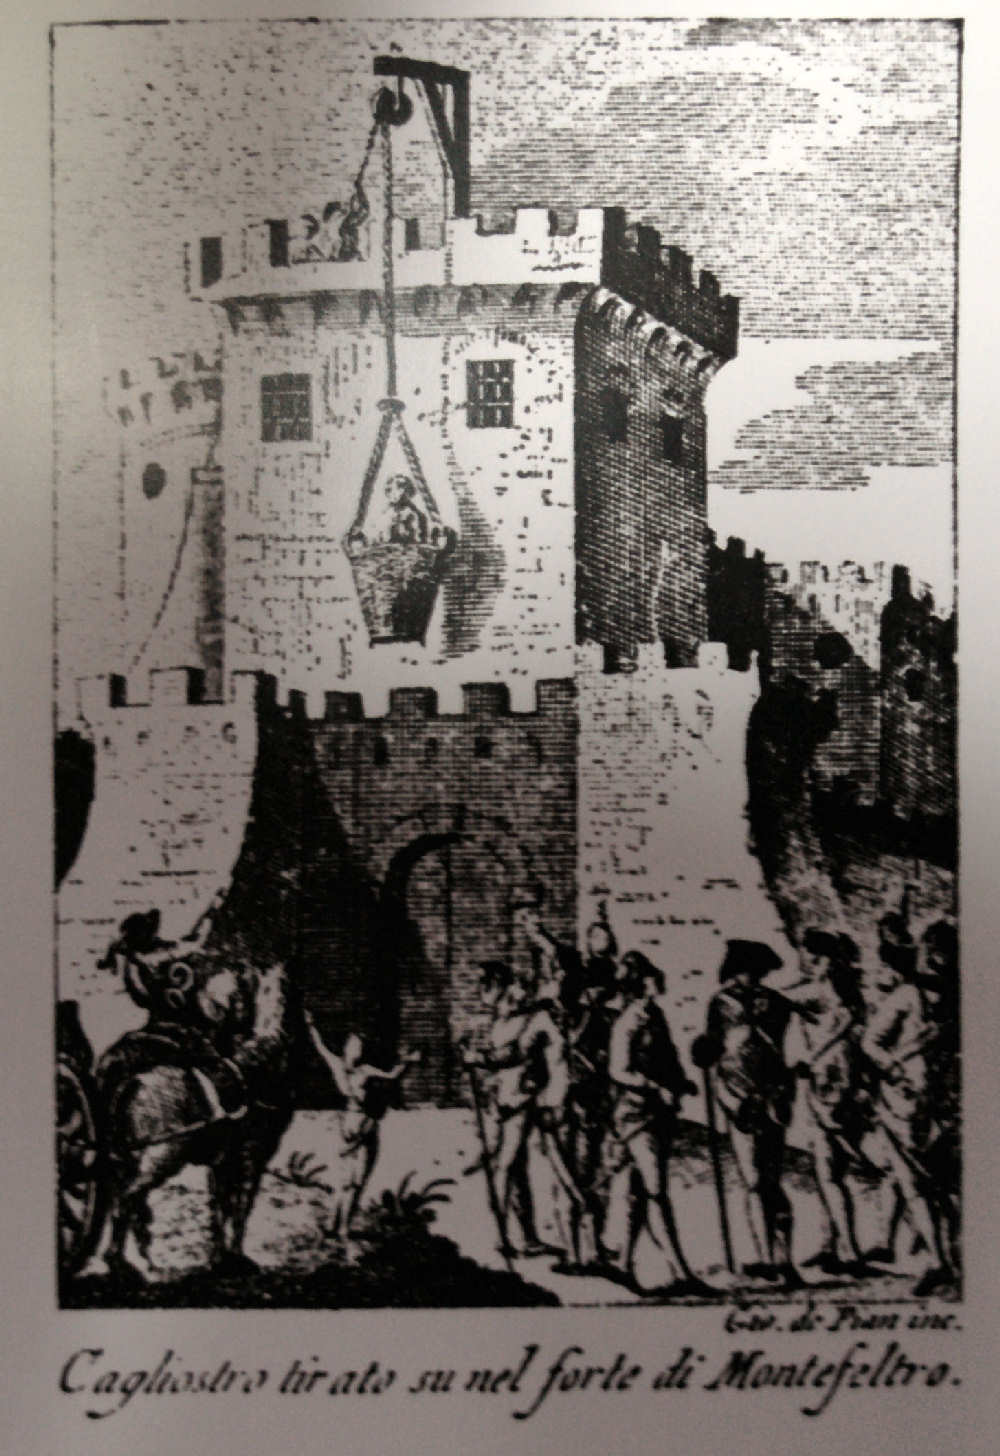
La condanna a morte venne commutata dal Pontefice nel carcere a vita da scontare nella cella del pozzetto nella inaccessibile fortezza di San Leo.

E Cagliostro venne portato a San Leo per essere calato nella cella del pozzetto ...

Se si può pensare ad un orrore questo non arriva a competere con la cella del pozzetto.

Questa cella non aveva una porta di accesso, ma solo la botola a soffitto da cui il prigioniero veniva calato.
L'unica porta era quella che conduceva alla stanza della porta.
La cella era di soli 3 x 3 mt ed ha un'unica finestra che guardava verso San Leo.
La finstra, considerata l'unico punto di fuga, era munita da tre orditure di inferriate.
Nonostante tutto questo uno spioncino, che guardava la piccola finestra, permetteva la sorveglianza delle finestra.

Come eretico scomunicato e quindi morto in peccato gli venne negata la sepoltura cristiana.
Il corpo di Giuseppe Balsamo Conte di Cagliostro è sepolto dalle 18.15 del 28 agosto 1795 sulla estrema punta del monte che guarda ad occidente.

E presso l'attuale pozzo di Cagliostro venne adagiato il corpo di Giuseppe Balsamo durante il tragitto dalla fortezza al luogo di sepoltura sul lato ovest del masso di San Leo
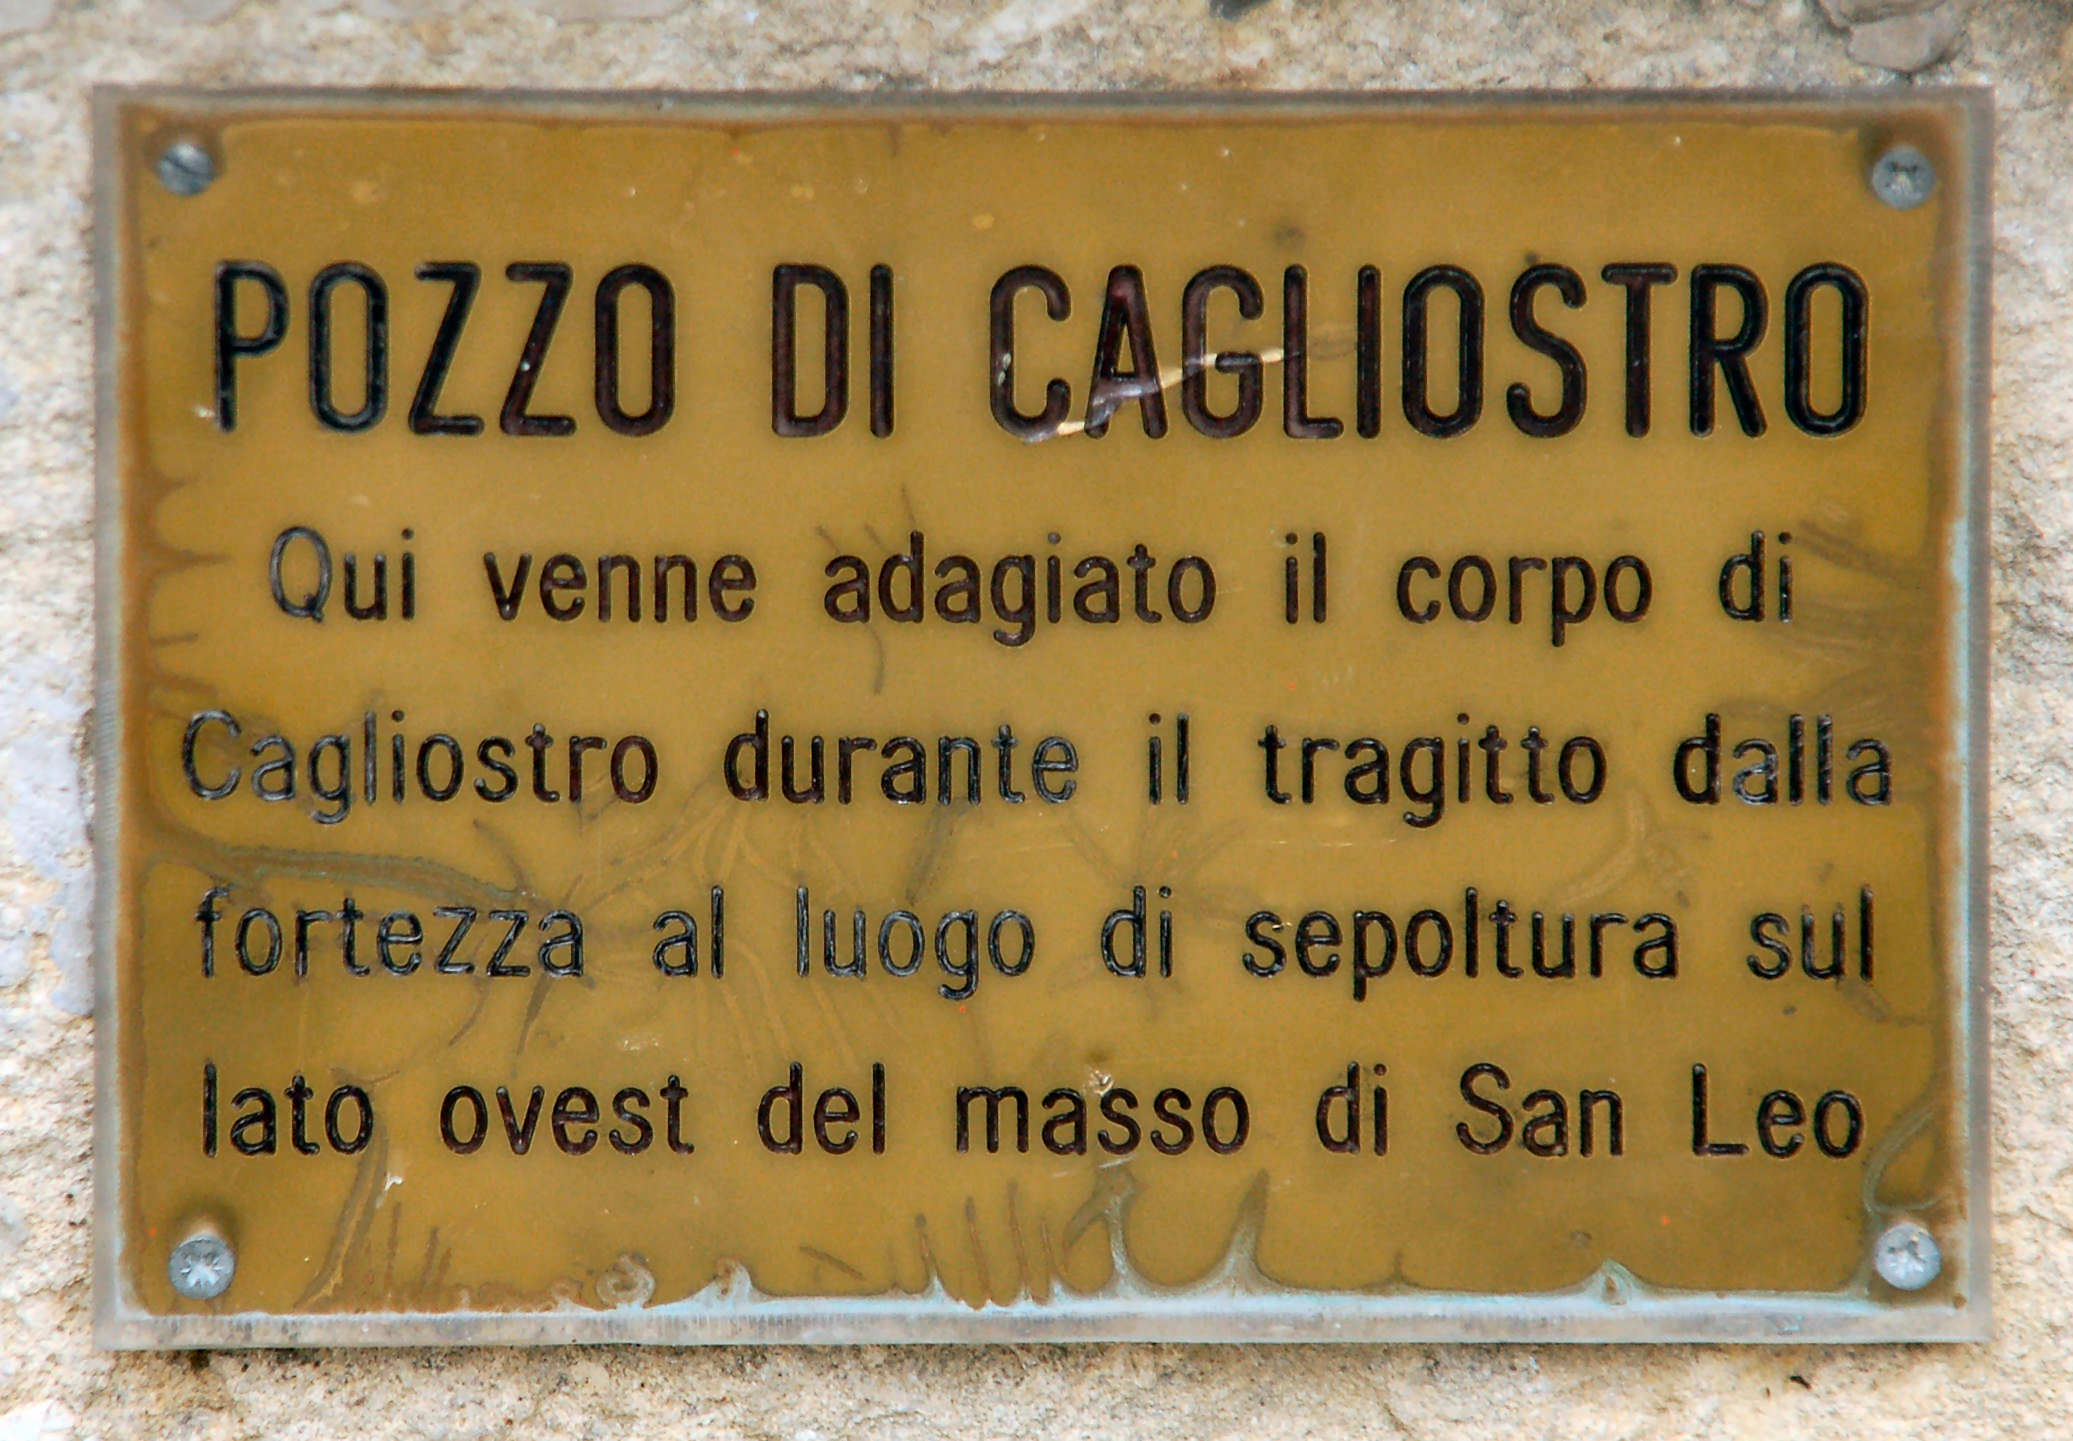

pozzo di Cagliostro

Ogni anno, il 26 Agosto, si ricorda la morte del Conte (1795), dove morì rinchiuso nella forte della rocca,  perché si racconta fosse un eremita, un mago dalle magie occulte!
La sera del 26 Agosto, la rocca ospita maghi e fattucchiere, arrivano da tutto il mondo e incontri persone più o meno strani.... ognuno con le loro credenze in fatto di magia!! ^_^

ALCHIMIALCHIMIE
24-25 E 26 AGOSTO 2012
San Leo ricorda Giuseppe Balsamo, conte di Cagliostro
attraverso una cena in fortezza, incontri, confronti, spettacoli e un mercatino Magico-esoterico alla scoperta di leggende, tradizioni e miti legati alla notte dei tempi. 


E ora torniamo a noi.. La storia continua nel raccontarvi che ho creato la mia primis collana..
 
Oggi è il mio giorno " Carpe Diem"


Pensando ai quei luoghi, alla fortezza, e a quella festa di quel giorno, tra maghi e maghe, mi son ricordata di una bancarella dove lavorano solo e solo rame, come una volta, come in quei tempi, per difendersi dalle fatture e dalla malasorte..con quei ricordi che mi fan sorridere nasce il mio Carpie Diem!!


Carpe diem, letteralmente "Cogli il giorno", normalmente tradotta in "Cogli l'attimo", anche se la traduzione più appropriata sarebbe "Vivi il presente" (non pensando al futuro) è una locuzione tratta dalle Odi del poeta latino Orazio (Odi 1, 11, 8). Viene di norma citata in questa forma abbreviata, anche se sarebbe opportuno completarla con il seguito del verso oraziano: "quam minimum credula postero" ("confidando il meno possibile nel domani").

Una lastrina di rame da 0.5 martellata. forgiata, patinata con lo zolfo e ripresa più volte con la tecnica del fold forming, per creare una pergamena..incisa, poi, non per sbaglio come notate dalle lettere, ma proprio di voluto..mi piace l'imperfezione, l'astratto del non riuscito!!

 Le perle che vedete le ho create con il fimo in pasta turchese, nero, e foglia oro, mentre le giunture sono create tutte a mano, usando il filo di ottone da 1mm, anticato con la candeggina.


Infine, per dare più un effetto di usura, con il dremel, ho levigato la piastrina e con il colore ad olio ho lasciato traccia del mio pennello..

Ho usato il colore ad olio piuttosto che l'acrilico, perché, a contatto con il rame, una volta asciutto, lascia una patina color azzurro-verde..(sarà una composizione chimica tra olio di trementina e il rame stesso).


Sono strafiera di me stessa!! 
Una collana dall'aria magica, un' amuleto fatto contro la malasorte, creata d'effetto, è immersa in una porzione potentissima ^_^

Quando cammini si sente il rumorio dolce del rame, tipo campanella...mi fa ricordare i posti magici di San Leo..pronta anche quest'anno a salutarla insieme al mio "Carpie Diem"!!!

Buon Week end ragazze della soffitta "magica" ^_^

venerdì 29 giugno 2012

Immagine su lamina e patina all'Americana!!

Designs are stamped on them with an ink pad and cleared up some with sharpie. The ink acts as a resist.
 The backs of the discs are stuck to tape, and they'll be suspended in an acid bath

 Discs are soaked in a thoroughly disgusting acid solution for a half hour. I'm supposed to be wearing rubber gloves, an apron, and boots. I did this in shorts and flip flops and survived.
 
 When done, they look equally disgusting. Some people call this art. I call it a sloppy mess in my backyard.
 
 Once they're pulled out of the acid, they're soaked in a baking soda and water solution to stop the etching process. This stuff foams...not for the timid.


When I pulled them out they still had ink on them, but they now have designs etched on them.


I removed the ink from most of these with pure acetone, and left a few dirty to show you.
 

Next I threw them in my rock tumbler for a few minutes to try to clean them up some more.


Getting ready to apply a patina fired finish with my blowtorch, I cleaned them with lemon juice and a Qtip to remove any dirt or oil from my fingers.


About to torch them with a butane torch (no pics...I can't work with fire and photograph at the same time)
 

The same piece after I torched it for a few seconds. It's darker than I'd like, so I'm going to go for less time on the rest.
 

The unetched backs of the discs before I torch them.
 

After torching for a few seconds, same discs...I'm loving the colors!
 

Same discs, only flipped to show the etched side.


The discs have been brushed with a clear enamel to keep the patina from changing over time. These are finished and ready for use.


The same discs, showing the patina on the back side.
 

domenica 17 giugno 2012

BOTTONI?? si ma di solo legno!! - riciclo & creo

took full advantage of winter break at my parents' house. They have a spacious garage chock full of every tool imaginable, and I was in heaven. I took the dogs out for a walk to the park one afternoon and found a couple perfect branches, so I couldn't pass up the opportunity to make these darling little buttons!

Materials:
  • hardwood branches
  • small hacksaw or table saw
  • fine-grit sandpaper
  • safety glasses
  • drill or Dremel
  • thin, sharp object or pencil
  • wood polish (such as Johnson Wax or Pledge)
  • soft cloth or paper towel
1. Begin by using a sharp tool or a pencil to mark the intervals where your buttons will be cut. You want them to be relatively thin, but they should not be so thin that they risk snapping. I found that they should be at least 1/8" thick. I marked next to my notches in yellow so that you can see them more clearly.

2. Cut the end of the branch using the hacksaw or electric table saw. The project is admittedly far more tedious when sawing by hand, but I wanted to show that this could be done without any major tool investment. If you do have an electric saw, I would recommend using that for expediency. Of course watch your fingers, and wear your safety glasses!

3. Place the sawed end of the branch over the edge of your work surface, and saw through the first line you've marked off. Once you've sawed that button off, continue until you have as many as you'd like.
4. Using your drill or Dremel with a very fine drill bit, carefully position your bit just left of center and drill through the button. I drilled atop an old piece of wood to protect my work surface. Repeat with the other side of the button to create two holes for sewing. If you prefer the look, then you can drill four holes instead.

5. One you've drilled through all your buttons, lightly buff each side with sandpaper to remove any edges that could snag clothing or other fabric.

6. After sanding, simply polish each button on both sides with a wood product, such as furniture polish or the like. This will seal the buttons a bit and give them a more 'finished' look. I used Murphy Oil Soap on mine because it was all I had on hand, but it's really more to clean than polish. I'd recommend a polish or wax for this step.

There you have it - as many cute little wooden buttons as you'll ever want. You don't need to buy any expensive tools, and you'll save a lot in the long run over ordering wooden buttons online.

UN AMORE DI CUORE - Wire

Valentines day is just a few weeks away, so I figure now is the time to post a tutorial for making a simple wire heart pendant! This is a basic heart, but once you create it, you can embellish it however you want…
You will need basic wire jewelry pliers (chain or bent-nose, round nose, cutters), a small file, a hammer and steel block. You will also need 16g wire and 24g or 26g wire, and a mandrel about 1/2 inch diameter… a fat marker works well.

Preparing the Wire
To start…. cut a piece of 16g wire 5 inches long, and file the ends so that they are flush. Then bend the wire using your chain nose pliers, so that one side is 2.25 inches, and the other is 2.75 inches.

Shaping the Heart
Now use the mandrel (ie: fat marker) to shape the sides of the heart. 16 g wire is a bit difficult to work with, so don’t get discouraged….! Start by holding the wire tightly on the marker, and then rolling (you are pushing – not wrapping!) the wire until you get a nice rounded shape – repeat for each side:

Shaped Heart Sides...
Once the sides are rounded (one side will be longer than the other), it’s time to turn the ends further inward, using the round nose pliers. It is very important to make sure that you don’t pull open the shape you just made on the mandrel! This may take a bit of practice since 16g wire is a bit difficult to work with.

Turning in the Ends
It is more effective to grasp the end of the wire tightly in the round nose pliers, and then PUSH the wire around the pliers, rather than trying to pull the wire, which will warp the shape of the sides and pull them straight.

Shaping the Heart
After you turn in the ends, you can shape the sides by PUSHING the ends toward each other, and gently pushing the sides out a bit, until it is the shape as shown on the right.

Hammering - the Final Shaping Step
Using a nice slightly rounded hammer and a steel block, flatten the heart frame – the ends may open a bit, and the sides may separate a little… that’s normal, you just need to tighten up the ends and bring the sides back together, as shown above. Next, we will use thin gauge wire to wrap the sides together, so the heart doesn’t open.

Closing the Heart
Cut about 4 inches of the thin wire (24g or 26g), and make a small hook at one end, then start to wrap the sides of the heart, as shown above. Wrap the wire through the loops on each side 3-4 times, and pull the wire taut, using your pliers as needed. Decide which side will be the front, and make sure that you pull the wire through, and cut both ends on the back.

The Wraps on the Back
The photo above shows the wraps neatly cut, and pressed down on the back… the only thing left is to add the bail, and hang on a chain.

Shiny... or Antiqued - Either Choice is a Winner!
I made a simple bail by wrapping a piece of 16g wire twice on the base round nose pliers, cutting and filing the ends, and hammering it a bit for texture. I then opened it and slipped it thru the loop of the higher side of the heart, so that it hangs balanced. Personally, I’m a fan of the antiqued look! If you have some wire wrapping skills, you may want to embellish the heart with additional wire wrapping, or adding some beads.

Bold Heart!
Related Posts Plugin for WordPress, Blogger...